
In the article [Article 1] - ProfileUnity from LiquidWare: installation and configuration I described all the steps that are needed to install ProfileUnity.
ProfileUnity comes with 17 predefined applications, ready to be deployed from Liquidware AWS S3 bucket in a Proof of Concept environment and not to end-users. In this example, Firefox is deployed to all the PoC-users who are member of the AD group Demo - ProfileUnity Firefox.
If you start the ProfileUnity web console you find all the predefined applications under Inventory Management:

In this example, Firefox is deployed to all the users who are member of the AD group Demo - ProfileUnity Firefox.
Create an application in the web console
|
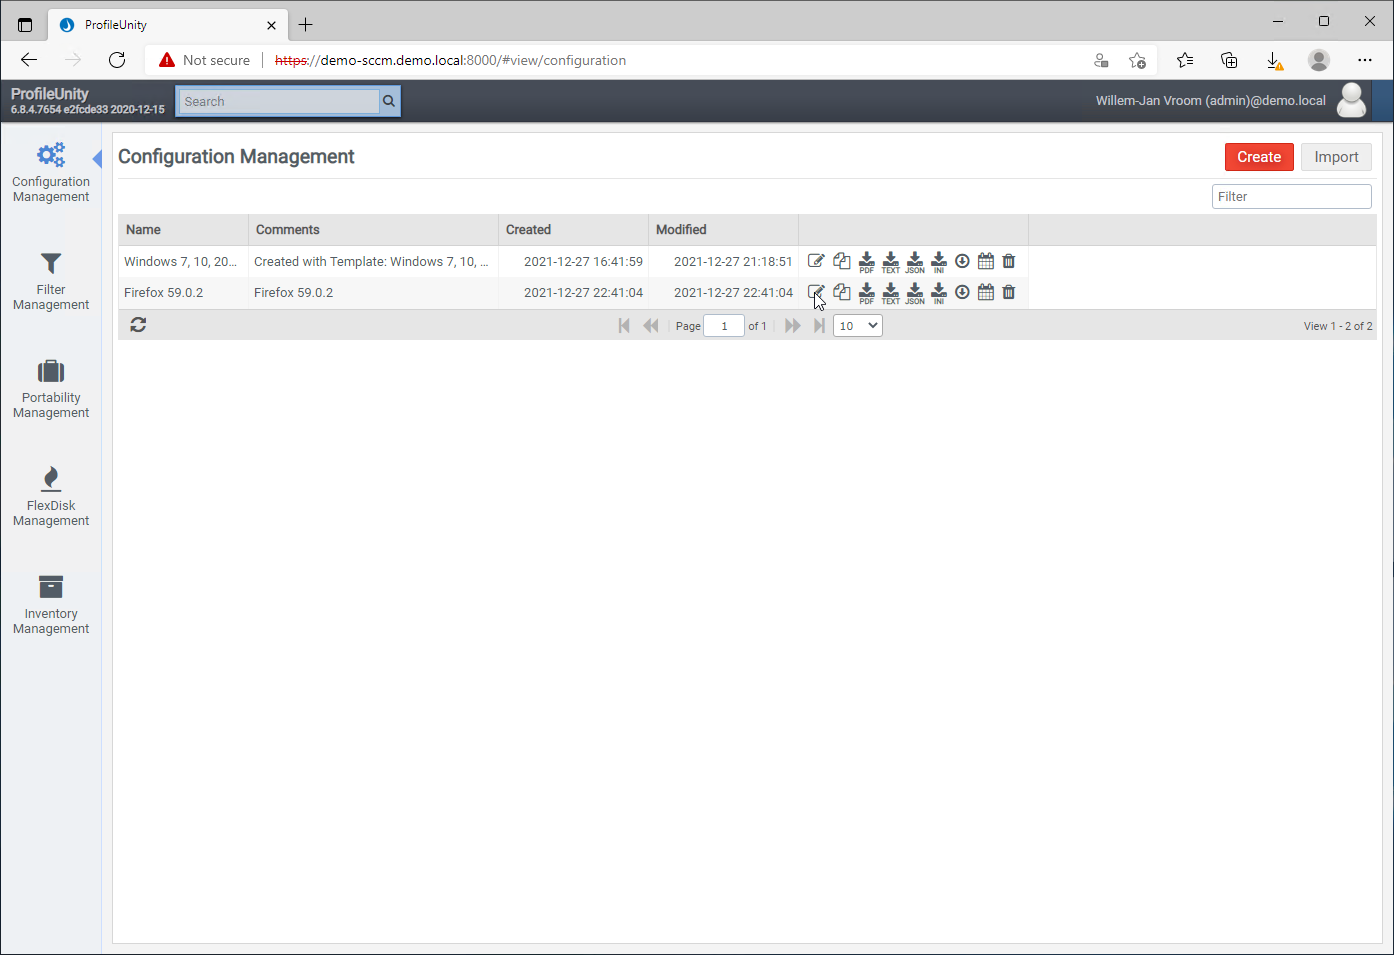
Start the web console. Click on [Configuration Management] followed by [Create] in the upper right corner. |
|
Click [Manual] |
|
Enter all the details. Click [Save] when done. |
|
Click [Edit] |
|
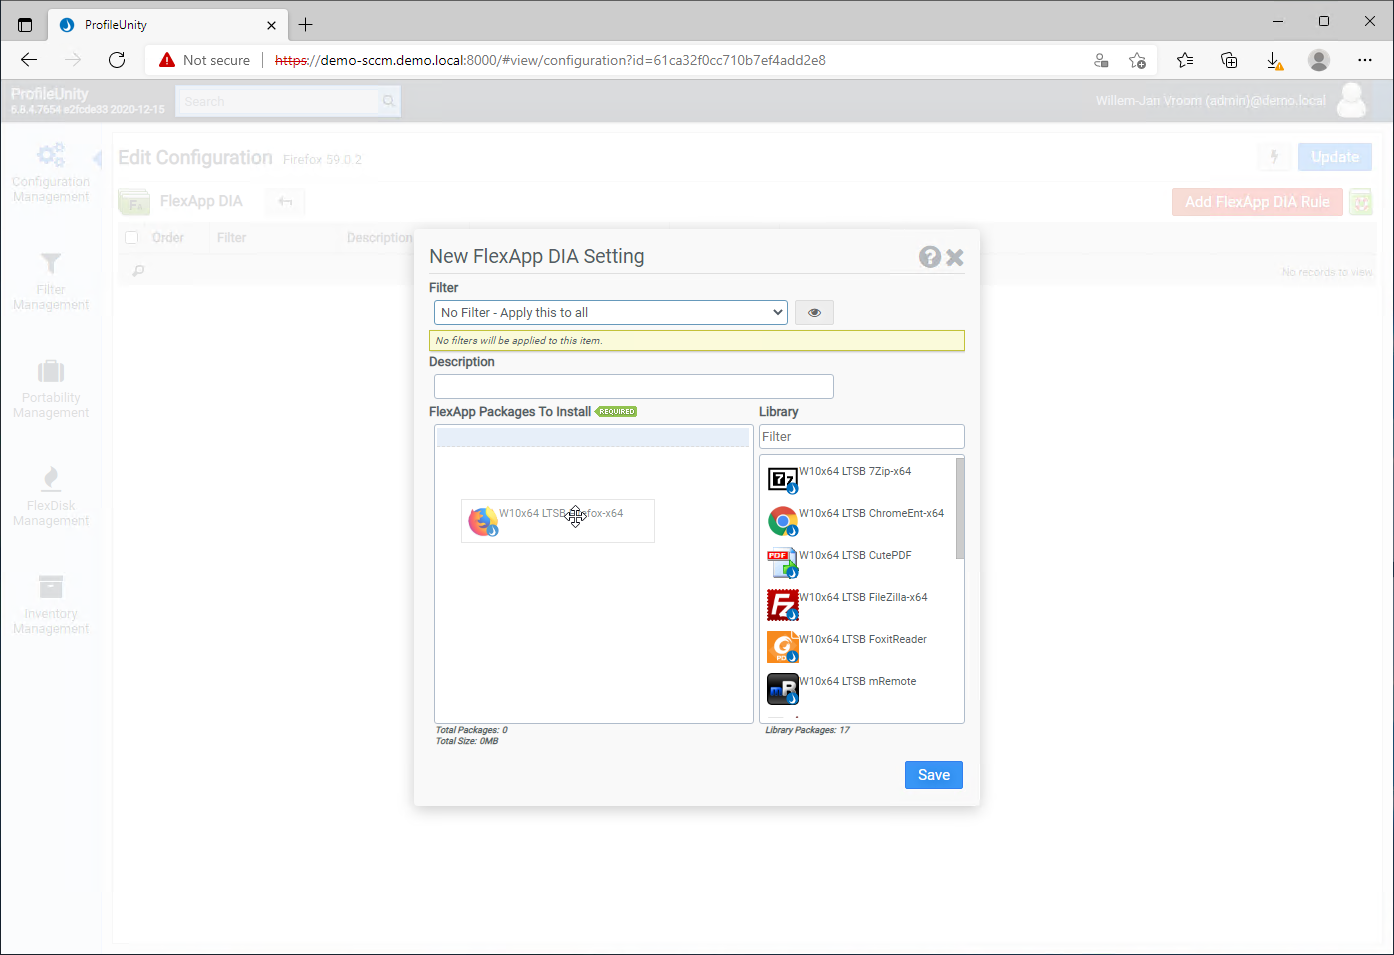
Click [FlexApp DIA] |
|
Click [Add FlexApp DIA Rule] |
|
Drag-and-drop Firefox to FlexApp Packages To Install. |
|
The end result. |
|
Click [Update] |
|
Deploy the configuration. Otherwise, the application will not be available to the end user. Also, a ini file Firefox 59.0.2.ini is created in the ProfileUnity share. |
|
A success box. |


Testing on a client
Now. logon on a client with a userid that is member of the AD group Demo - ProfileUnity Firefox.
|
Firefox is available on the desktop. |
|
The application is delivered as a virtual disk. |


The next article is about packaging an application.
Other articles in this series:
- [Article 1] - ProfileUnity from LiquidWare: installation and configuration
- [Article 2] - ProfileUnity from Liquidware: deployment predefined application Firefox
- [Article 3] - ProfileUnity from Liquidware: create a FlexApp Application
- [Article 4] - ProfileUnity from Liquidware: FlexApp Package Automation
- [Article 5] - ProfileUnity from Liquidware: create a FlexApp One Package
- [Article 6] - ProfileUnity from Liquidware: integration with Ivanti Workspace Control
- [Article 7] - ProfileUnity from Liquidware: Install Liquidware FlexApp ONE applications via Microsoft Endpoint Configuration Manager